In my memory, I have been planning to start a blog since 2021, but the idea has always been greater than the action. It has been delayed until now. I am an old procrastinator… I will share my process of creating a blog for your reference and copying.
Hugo Installation and Configuration
To use Hugo on Windows, you must first install Git, Go, and Dart Sass. Although not required in all cases, these three languages and tools are the most common. Here you can go to the corresponding official website to install it. I won’t go into too much detail about the installation here.
Installation Link:
Git
Go
Dart Sass
After completing the installation, we need to choose a theme from hugo’s theme. I am using the Clean White theme. After selecting, we use the hugo command to create a new site.
hugo new site
Then enter the home directory and clone the selected theme to the theme path.
cd <your_folder_name>
cd theme
git clone https://github.com/zhaohuabing/hugo-theme-cleanwhite.git # your theme
After configuring the theme, the easiest way to start the configuration is to copy the sample site in the theme to the hugo source path, so that we can modify the corresponding code by observing the mapping between the configuration file and the specific effects of the site. Use the following command to copy.
cp -r hugo-theme-cleanwhite/exampleSite/** ../
At this time we can test whether our sample site is configured successfully and use the following command to open it on localhost
hugo server
After running, enter http://localhost:1313/. To modify the elements in the blog web page, we need to modify the hugo.toml file. Here you can view the documentation of the selected theme to learn how to configure it. Here is the Clean White git warehouse address https://github.com/zhaohuabing/hugo- theme-cleanwhite, save the file after modification, and you can see the changes we made at http://localhost:1313/.
Hugo’s blog posts are stored under the content path, where the folder under content represents our specific paging. After opening a folder, we can see all the blog files under the folder. At the beginning of each blog, we need to have relevant information about the blog. Here is one as an example (this is the configuration information of Clean White, which can be viewed in the exampleSite of different themes).
---
title:       "Hugo + Github Pages + Github Actions Blog deployment plan"
subtitle:    "Blog Set Up"
description: "This article introduces the use of Hugo as the blog source code, Github Page as the deployment solution and the use of Github   Action to configure CI/CD"
date:        2023-11-02
author:      "UNKNOWN SPACE"
image:       ""
tags:        ["Hugo"]
categories:  ["post"]
URL:         "/2023/11/03/HugoSetUp/"
draft:       false
---
It should be noted here that if draft: true exists in the configuration item, the article will not be seen. You need to delete this line before the article can appear on the interface. After completing the configuration, we will use markdown syntax to write the text below. I will not go into details about markdown here.
If you want to create a new blog post, run the following command
hugo new post/your_blog_name.md
Here post represents the folder name under the content path, and / is followed by the name of the file to be created.
Github Pages Deployment
After completing our configuration and article adjustments, we can start deploying our blog. Here we will use Github pages for deployment. First, create a warehouse on Github. The warehouse name is <username>.github.io. Here you need to replace <username> with your Github username. Note that the name of the warehouse must be in this form, otherwise it will not take effect.
Clone the repository locally
git clone https://github.com/<username>/<username>.github.io.git
Now we can package the hugo source files. The method is very simple. Go to the root path of our Hugo site and run the following command
hugo
We can see that a ./public folder has been created. This folder is the static page we need for deployment. Copy this folder to the Github pages folder we cloned.
After copying, push the contents of this folder to the Github repository.
git add --all
git commit -m "Initial Commit"
git push
After the automatic deployment is completed, you can enter https://<username>.github.io in the browser to view the blog.
Congratulations! Now you have a blog of your own.
Note: Here I encountered the problem of CSS not being displayed during deployment. The reason is that there was an error in the .toml file configured earlier. If you encounter the same problem, the recommended repair process is as follows
- Check whether the baseurl is correct, the form should be
baseURL = "https://<username>.github.io"- Add the true one at the beginning
Github Actions CI/CD Configurations
Although we can now write and modify blogs, our modification process is very complicated now. Every time we update, we need to build hugo, copy the public folder to Github pages, and then upload it. In order to focus on writing, we can simplify the process by configuring CI/CD. Here we choose to use Github Action to configure.
First we need to configure our Personal access token, which is a way to call the API for programmatic operations without requiring password verification. Here you need to click Setting in the right sidebar of Github (click the sidebar that pops up on the avatar, note that it is not Setting in the warehouse), and click Developer Setting in Setting.

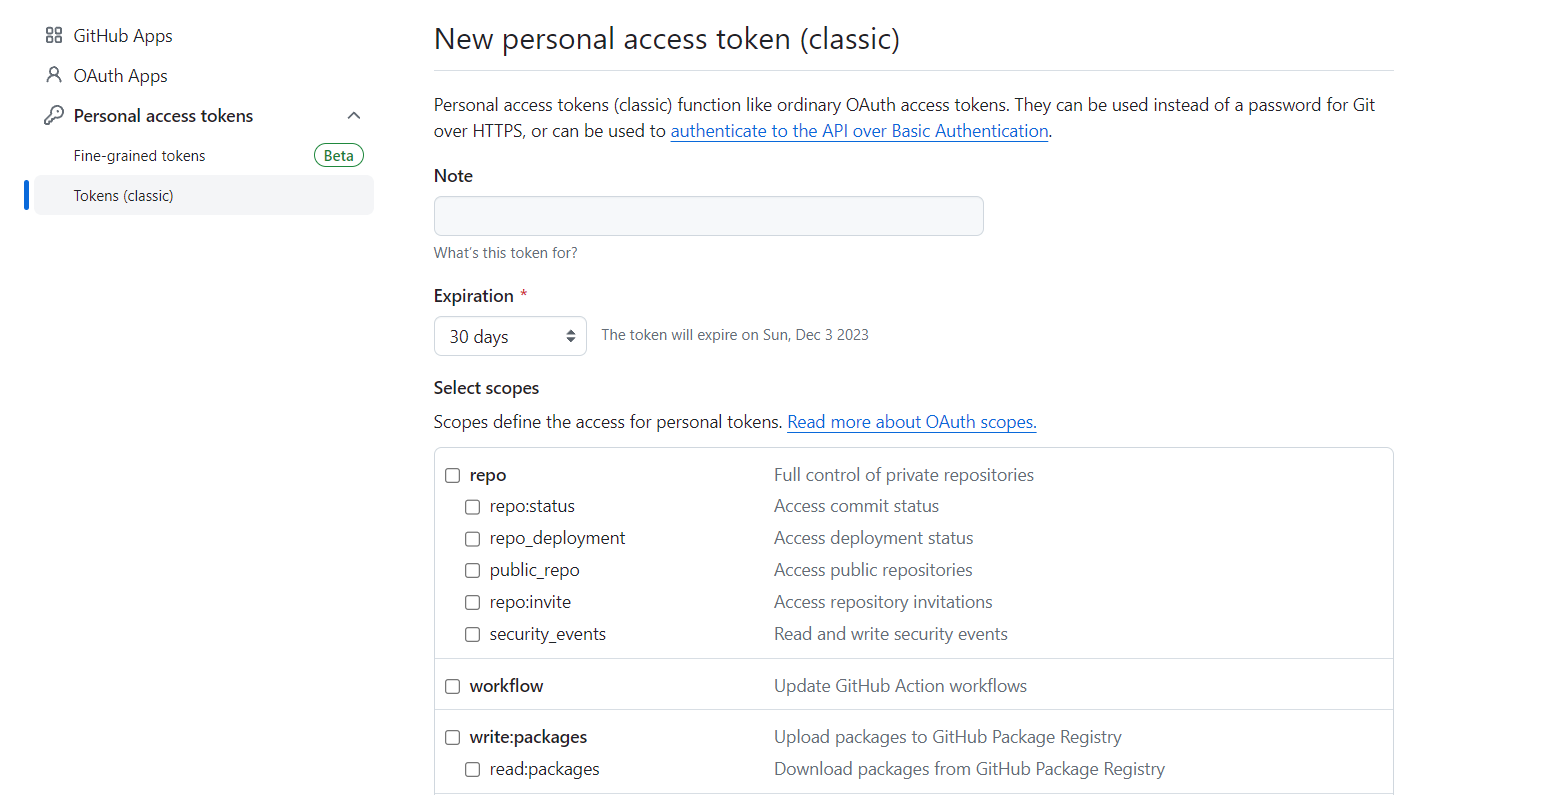
Here we just select Classic Token and click Generate new token in the upper right corner
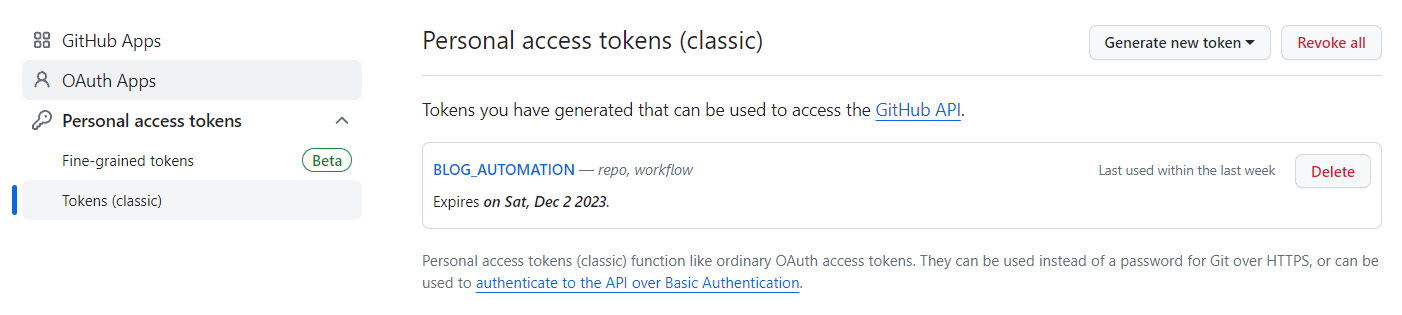
Fill in whatever you want with Note, select workflow in Select Scopes below
After clicking Generate Token, pay attention to copy the generated Token in time. If you exit the interface but have not copied it, you can only regenerate one. Next, we go to the Github project of the Hugo source file, enter Settings, select Secrets, and select New repository secret in Actions.
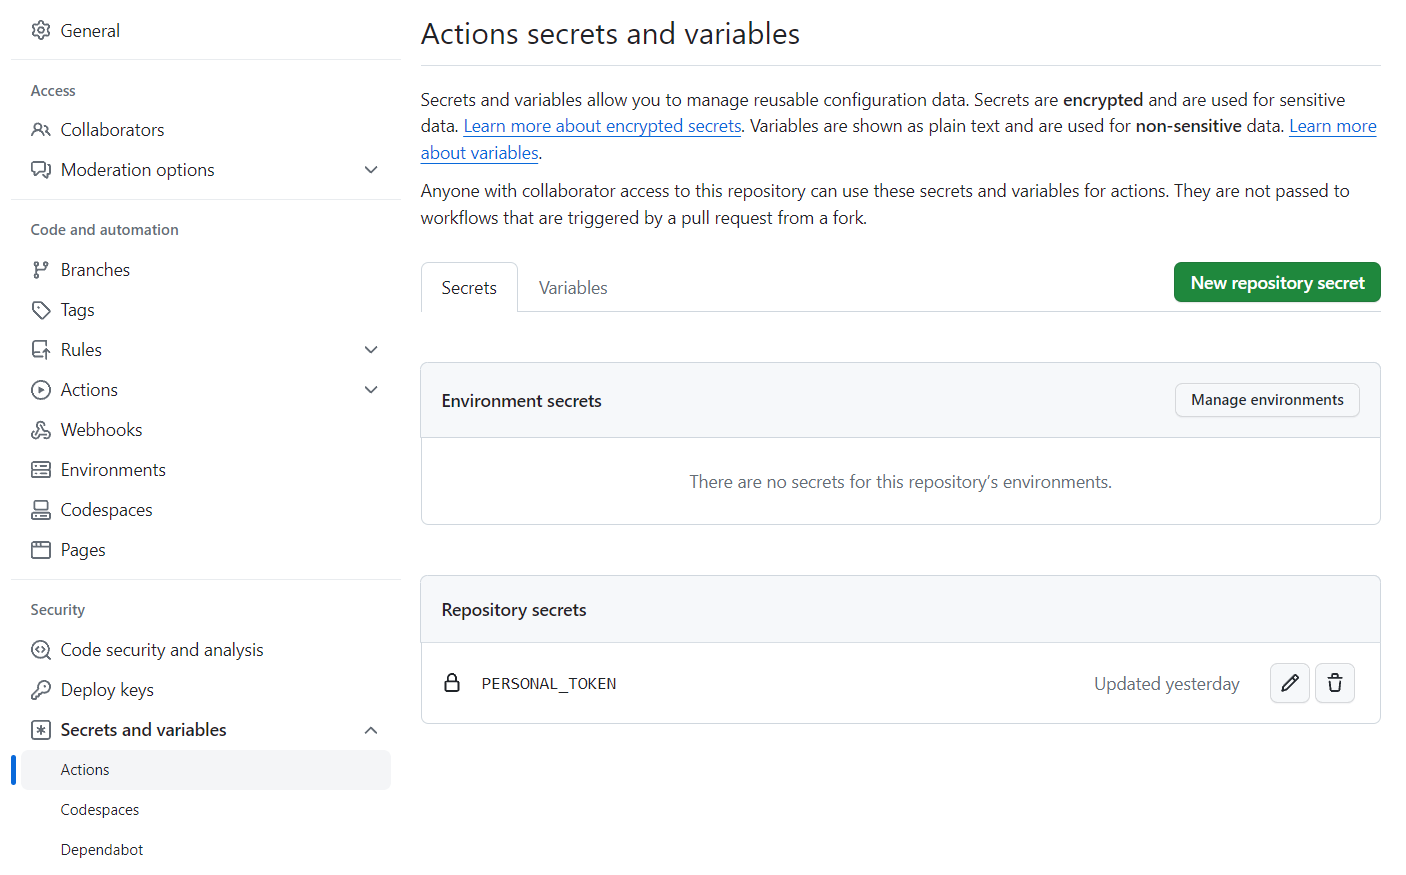
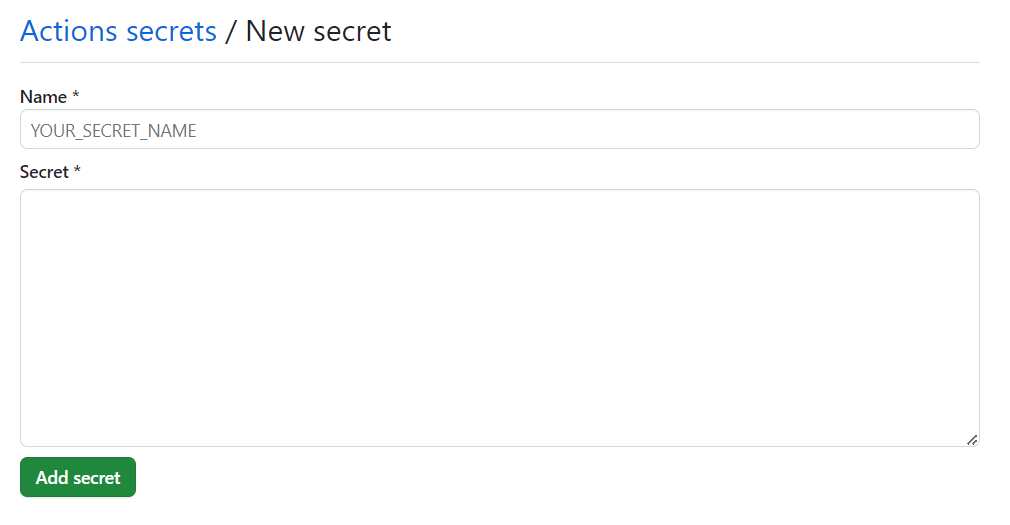
Fill in PERSONAL_TOKEN (the value set in the .yml file) in Name, then fill in the Token we copied in Secret, and click Add secret to complete the Token generation.
After completing the generation of Token, we need to configure Github Actions. First put our hugo root directory into a github warehouse, add the .github/workflows path in the warehouse, and create a .yml file under this path. Here we need to write CI/CD related information and specific procedures. The main things we need Github to help us complete are:
- Automatically build hugo after reading push changes
- After building hugo, automatically upload the contents of the public folder to the Github pages folder.
- Push the latest changes in the Github pages repository to automatically call the deployment of Github pages
Here my .yml file is as follows:
name: unknown_space # Replace with the name of your Hugo source file repository

on:
  push:
    branches:
      - main # Branch name,here mine is main

jobs:
  build-deploy:
    runs-on: ubuntu-latest
    steps:
      - name: Check out source
        uses: actions/checkout@v2

      - name: Setup Hugo
        uses: peaceiris/actions-hugo@v2
        with:
          hugo-version: '0.119.0' # replace to your hugo version,use hugo version to check at command line
          extended: true # extended hugo version or not (chosed while installation)

      - name: Build
        run: hugo

      - name: Deploy
        uses: peaceiris/actions-gh-pages@v3
        with:
          personal_token: ${{ secrets.PERSONAL_TOKEN }} # deploy token and github token are also supported
          external_repository: <username>/<username>.github.io # change to your username
          publish_dir: ./public
          publish_branch: main # target branch name
After completion, we can upload it for testing. If we see that the build passed in Actions, wait for a while and see if the changes have been applied to our site. If you change it, you’re done~ At this point, our configuration is over.
To be continued~ (The tutorial on how to be searchable in the browser will be updated)